Ticket Example : EKZ-161-56433
There are many reason that contribute to this issue and there are also many solutions to encounter it if the problem still persist.First, go to dnsviewer and copy the nameserver displayed. SSH to the nameserver and enter root. Then, copy the ip address by typing
ifconfig
Follow next steps below:
1. Go to DirectAdmin and login to the particular account.Change/generate to a new password.
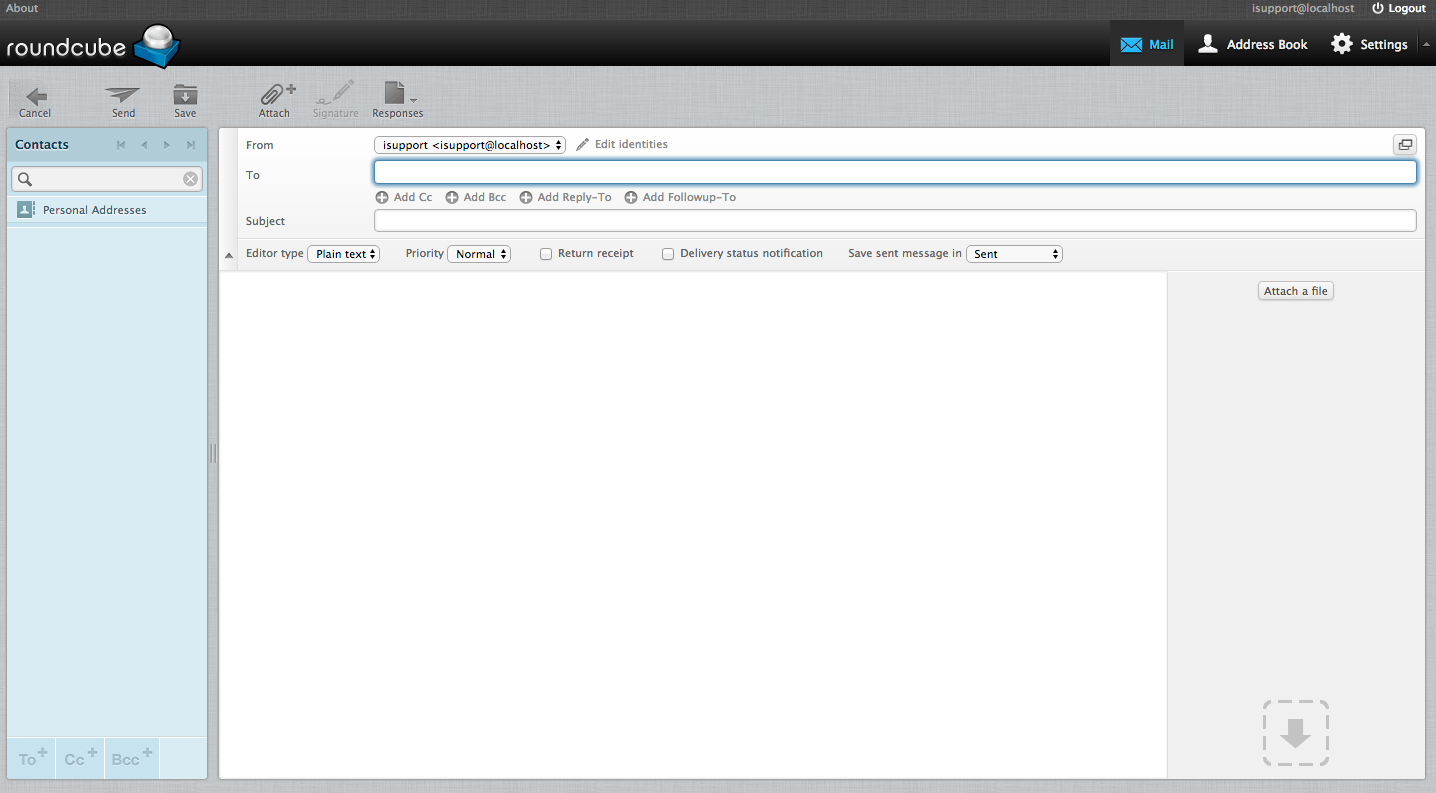
2. Copy the new password given and login to RoundCube webmail from the DirectAdmin by pressing “command + webmail icon”.
3. At the dnsviewer, check if the IP address in SPF (TXT record) match with the IP address checked in ifconfig. If there is no SPF in the TXT record, the mail will probably go into junk. Please refer to the post on How To: Configure SPF record.
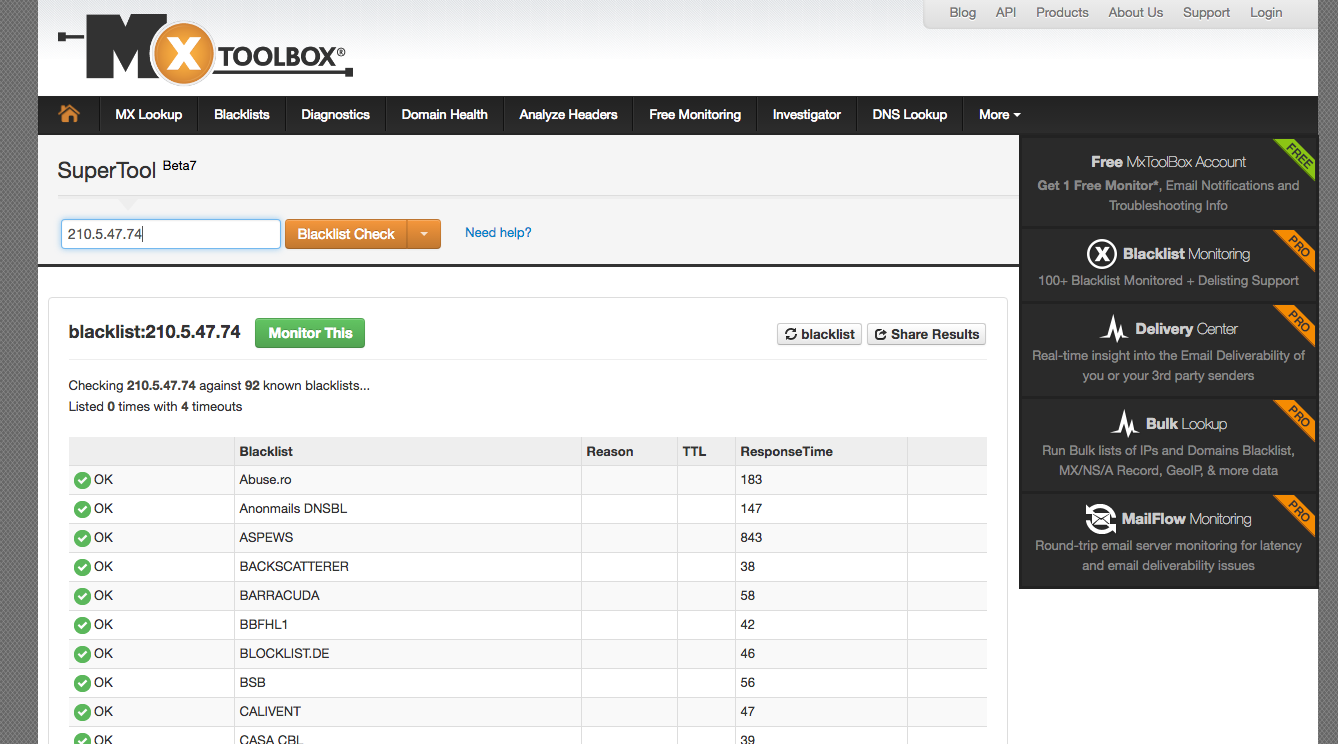
4. Go to MxToolbox, click “blacklist” and check if the ip address is blacklisted or not
Mxtoolbox is one of the tools and a multi-platform service that provides free, fast and accurate network diagnose and lookup tools and related email security services. You can also go to other tools or website such as Senderbase (beta.senderbase.org) to check blacklisted IP address.
2. Next go to www.mail-tester.com and copy the email address given in the search box.

12. Using the email address given, go back to Roundcube webmail and try to send an email
13. Then, check your score in mail-tester. If you able to get 5/10 score and above, this verify that the email address is ok. If score is below 5/10, it means that the email is compromised.
14. If the IP address is currently blacklisted, you can whitelist it. Please refer to the post on How To: Whitelist Setup.
If the issue seems to happen again after you have configure the steps above, you can also try the steps below which is by allowing another alternative route for the email to pass through. You can configure a Premium Mail Gateway for the domain you wish where the server will go through the gateway for outgoing emails which using different IP Address each time email sent.
After ssh to the nameserver and enter the root, go to the edit mode by typing
vim /etc/exim.conf
In the edit mode, search for manual routes and add the line below. For example, if you want to allow astro.com.my to pass through the alternative route, add to the domain below.
  mrelay_300:

  driver = manualroute

  domains = astro.com.my

  ignore_target_hosts = 127.0.0.0/8

  condition = "${perl{check_limits}}"

  transport = remote_smtp

  route_list = * mrelay-300.small-dns.com

  no_more
Next, reload
service exim restart
Then,ssh to mrelay_300 and go to edit mode by executing
vim /etc/exim/exim.conf
look for “relay_from_hosts” and add the IP address of the domain.
domainlist local_domains = @ : localhost : localhost.localdomain

domainlist relay_to_domains =

hostlist   relay_from_hosts =  210.5.47.196 : 183.81.167.201 : 103.21.183.65 : 45.64.169.11 : 103.21.182.226 : 14.102.145.191 : 14.102.146.31 : 210.5.47.78 : 103.21.183.188 : 210.5.46.68 : 103.21.183.197 : 183.81.163.126 : 103.21.183.186 : 103.21.183.187 : 210.5.47.75 : 210.5.47.74